Homemade soap!
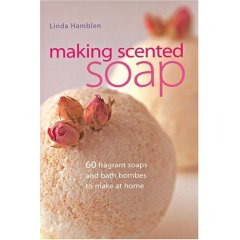
I picked up several great books from the public library in San Marcos last night: Best Hikes with Dogs in Texas Hill Country and Gulf Coast, The Green Collar Economy, Unbowed, and Making Scented Soap.
There’s been a lot of talk recently, probably due to flu season creeping around the corner, that antibacterial soaps are not the best option for daily use. Bacteria and viruses have become immune to our antibacterial products and have become stronger due to evolving against our defense. The best option is basic soap combined with enough hand scrubbing (sing happy birthday to yourself). After attending a “Skills for No Impact Living” discussion last night, I decided I wanted to learn how to make my own soap! Doing this is not only fun, but it saves money and reduces the amount of plastic I’ll have to throw away. Even though I buy the big bulk container of liquid soap and refill my smaller hand soap dispensers, this is really the next best step in reducing my impact.
In my Making Scented Soap book by Linda Hamblen, she gives directions on how to make all different types of soap, including clear soap, liquid soap, cold processed soap, bath bombs, and message melts. I want to focus on liquid and clear soaps.
For a good, quick history of soap making and the outline of the process watch this video.
Some basic tools and equipment you will need:
- Scale
- Stainless steel saucepans
- Stainless steel double boiler
- Large mixing bowl
- Measuring spoons
- Dropper (if your using oils)
- Spoon for stirring
- Plastic molds
- Slicing knife
- Goggles, gloves, and mask
Making liquid soap is quick and easy and allows you to use smaller pieces of soap that not big enough to use and too good to throw away. If you add a teaspoonful (5 ml) each of glycerine and vodka (along with essential oils in your recipe) you will improve the texture and add skin softening properties.
- Step 1: Finely grate leftover soap or use ready-made clear soap base pellets or soap base block
- Step 2: add the grated soap to the top of a double boiler, mix in water, and slowly melt over medium heat
- Step 3: When fully melted, remove the pan from the heat, let it cool for a few minutes, then add essential oils and mix
- Step 4: To adjust the consistency just add more water. Floral waters are good for diluting. Store your final product in an airtight container to avoid evaporation and thickening
Making clear soap is also very easy.
- Step 1: Fill the bottom half of a double boilder with water, put on to heat. While that’s going, weigh out the soap granules and prepare your essential oils and botanicals.*
- Step 2: When water is boiling, turn heat down to simmer and add granules to top half of the double boiler. Leave to melt, occasionally stir.
- Step 3: When completely melted, remove from heat, set aside to cool. Stir in essential oils and botanicals.
- Step 4: Pour soap into mold. If you want your botanicals throughout the soap, let the soap cool for another minute or two, stirring as it starts to thicken.
- Step 5: Let soap cool and set for an hour or two. Cut into the sizes you want and use!
*Basil is an example of a botanical. It is steeped in folklore and can be used to add greeny brown color to your recipes while giving off a nice scent. Soapwort is another botanical which is high in natural saponins which, after being boiled, make a gentle shampoo. Historically, it’s been used for cleaning wool and cloth. Jasmine is an example of an essential that that has an intense rich and sweet floral fragrance. Rosemary in my favorite essential oil; it’s a scared plant and of the earliest to be used for food, medicine, and magic.
Go ahead and give soap making a try! It’s a great hobby that gives you the satisfaction of knowing that you are a producer, not just a consumer.


I recently stumbled on your blog. Its amazing to me to see the different processes and creativity each one of us use when making soap. I look forward to hearing about whats next.
~Melissa
Cheers to individualism! Thanks for checking my blog out!